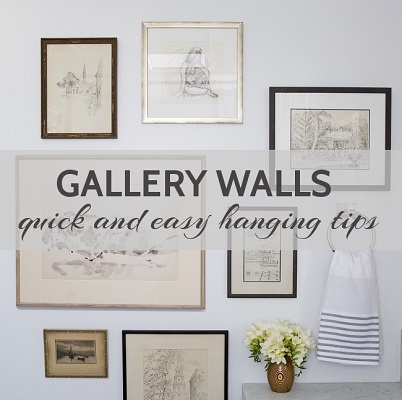
Gallery Walls: Quick and Easy Hanging Tips
by
I go to a lot of houses for interior design consultations, and the great majority of them have nothing, or almost nothing, on the walls. It seems most clients are paralyzed about where to start with art. I hope this helps you find some direction and motivation to begin! If you don’t already have a lot of pieces of art to work with, you’ll need to do some shopping first. There are so many great options to buy original art online. My favorite suggestions to start are listed and linked on my own online vintage art shop page, along with Artfully Walls (reproductions) and your local flea markets. All of the pieces below were found at flea markets while shopping for inventory for my shop and my clients. A couple of them were unframed and I framed them before laying out this wall.
I love rooms that are personal and unique, so buy whatever catches YOUR eye, and don’t worry about trends. If you need inspiration about types of things you want to shop for, or types of installations you’re trying to achieve, please visit my Pinterest boards for thousands of beautiful photos that I’ve collected there.
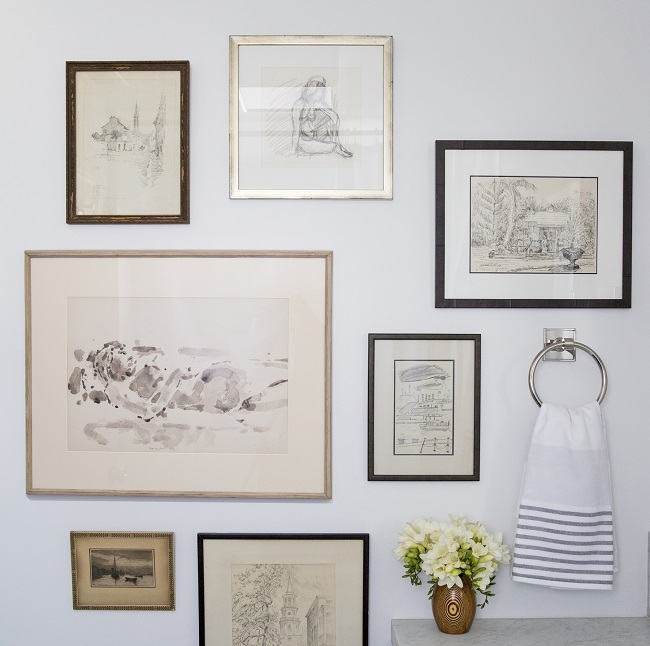
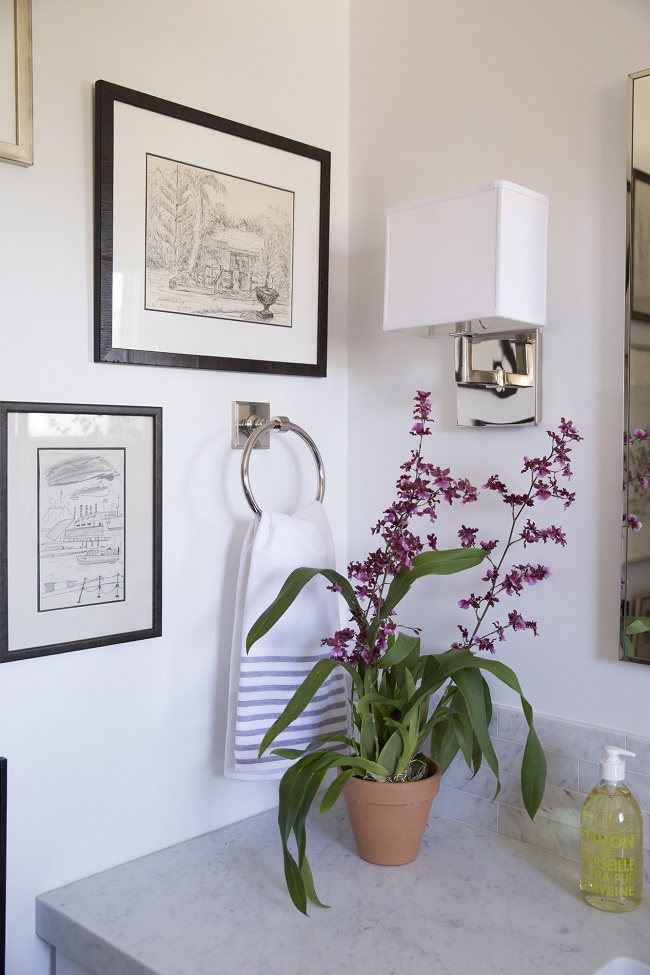
Here is the finished product I’ll be discussing in this post:
The process:
- Assemble the pieces of art that you want to use. I often start with more pieces than I need because once I see them all together some things look better or worse together than I expected, and I need to add or edit accordingly.
- Measure the wall space to determine how tall and wide your grouping should be. My wall space is 96″ H x 65″ W and my grouping ended up being 61″ H x 52″ W overall. There is 9″ of wall space between the ceiling and the top of the highest frame.
- Lay them all out on the floor in a way that looks pleasing to you. It’s like a giant puzzle and you could go around and around for a long time. You’ll get there! My third grader is doing word problems in math now (Heaven help us) and I keep telling her to just start putting her pencil on her scratch paper, make mistakes if needed, and all the mistakes will help her get to the answer. See this other blog post about hanging a gallery wall and all the ways I moved the pieces around until I came up with the final arrangement.
- Measure the grouping to see if it makes sense for your wall space, keeping in mind the amount of blank wall space you want exposed all the way around it. The amount of space to leave exposed really depends on the room, there is no hard and fast rule here.
- Cut out pieces of paper to match the size of each piece of art. I used kraft paper, but newspaper or any other type will work. Ideally it would have a good contrast with the wall color so you can really see what you’re doing.
- Use painters tape to duplicate your arrangement on the wall. The beauty is that you can keep moving it all around until you get it just right. You might need to adjust things from what they looked like on the floor.
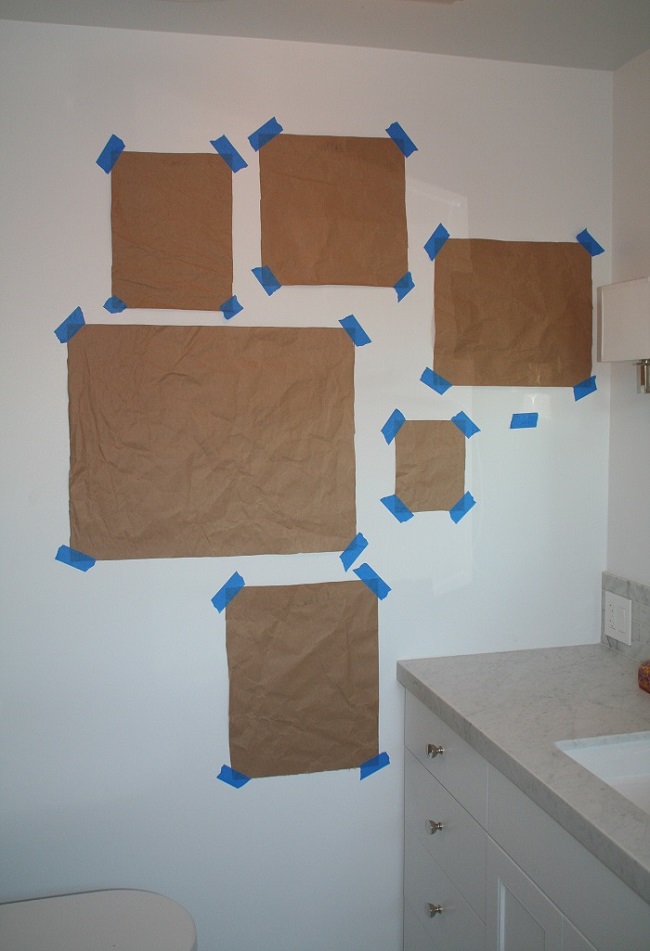
Then, mark on each piece of paper where the nail hole should be, by measuring the back of each frame from the top down to where the hanging hardware is.
Put your nails in right through the paper!
Remove paper and hang each piece. SO much easier this way.
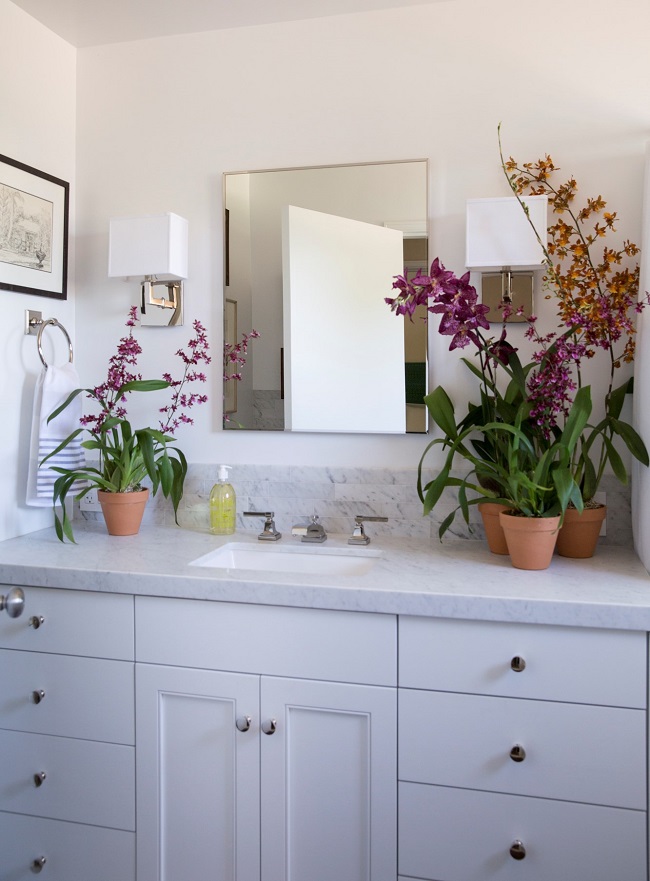
And here is is again, all installed, from a bit further back:
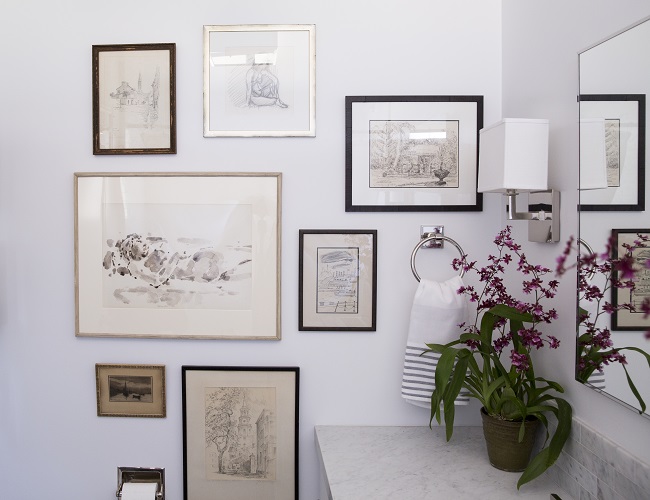
Here are a couple of other views of the same room:
For instruction on other methods of hanging art, please view these blog posts: How to Create a Gallery Wall of Art , and A Step-by-Step Guide to Placing Art.
NEED DESIGN HELP? I HAVE A NEW WEBSITE TO TEACH PEOPLE HOW TO DO INTERIOR DESIGN FOR THEIR OWN HOMES! Visit PLAN + ELEVATE to watch video tutorials, download exclusive resources and tools, and sign up for a personal interior design video consultation where you can get specific questions answered about your own rooms.
I’m available for hourly interior design consultations or art consultations in person in the South Bay of Los Angeles: Palos Verdes, Redondo Beach, Hermosa Beach, or Manhattan Beach.
Let’s keep in touch!
- Follow me on Instagram
- Follow me on Facebook
- Follow me on Pinterest
- Follow me on YouTube
- Visit my blog menu to see more posts
- Sign up for my newsletter
- Or email me here
And share this post by clicking the icons below. Good luck with your design projects!
Anna
Photo credits: The rough, kraft paper installation photo is by me, and all of the pretty “final” photos are by the talented professional, Jen Siska.
in the press
in the press
